
Public Hubs
Public hubs are shared hubs listed for discovery. They are useful for learning Thalovant, trying examples, and creating Free-path connections before creating your own hubs.
You can use a public hub without owning that hub. The shared hub keeps its own skills and runtime. You create your own connection and keep that client’s permissions narrow.
Daily Desk is the public showroom for the private Daily Desk path. It does not store personal memory or use private workspace data. Use Memory when you want a paid private workspace to remember preferences, notes, and facts.
For the full route, see the public hub scenario. For the simplest account path, see Free Tier.
If you are brand new, public hubs are the safest first path because you can learn the client and permissions flow without creating your own hub.
Start Here If
Section titled “Start Here If”- you are exploring Thalovant for the first time;
- you want a Free-path setup before creating an owned hub;
- you need a public hub connection path with narrow access;
- you want starter prompts before deciding what to build.
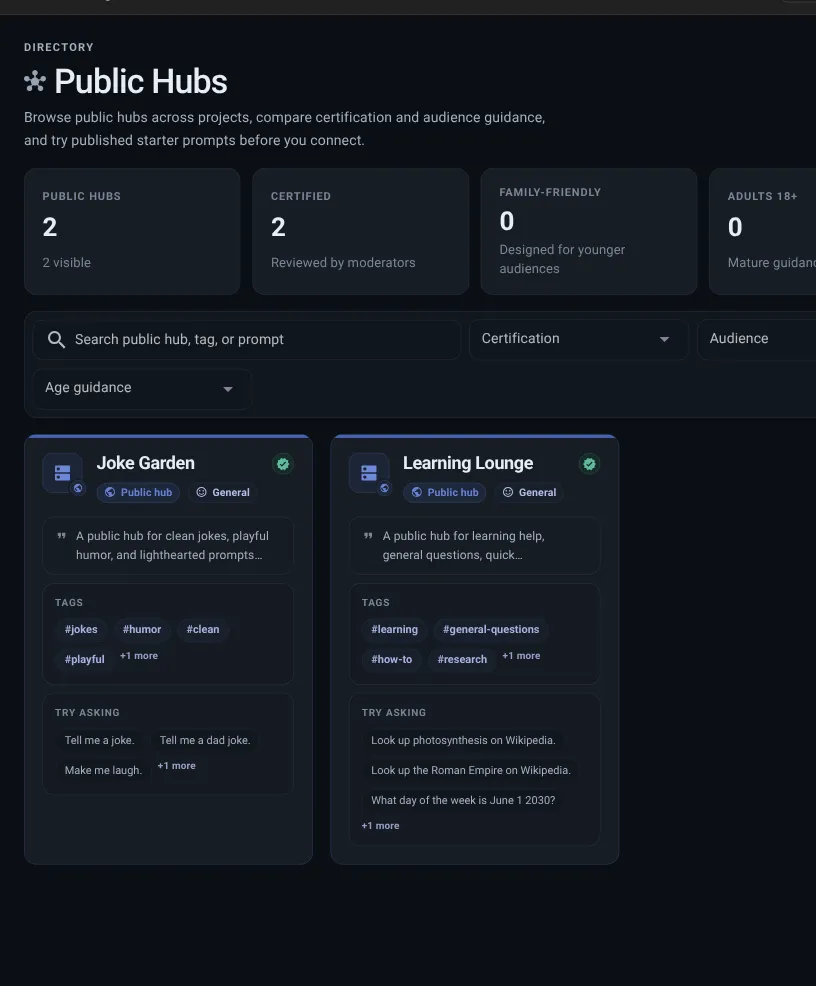
Public Hub Cards
Section titled “Public Hub Cards”Public hub listings can include:
- title and description;
- quality label;
- community label;
- audience category;
- age guidance;
- tags;
- starter prompts.
Starter Prompts
Section titled “Starter Prompts”Starter prompts show what the hub is designed to handle. You can copy a prompt or try it when live preview is available for that hub and your plan has remaining preview allowance.
Good starter prompts are:
- short;
- plain language;
- free of links or markup;
- clearly related to the hub purpose.
Public Hub Client Path
Section titled “Public Hub Client Path”- Choose a public hub. Use filters for quality label, audience, age guidance, and tags.
- Read the listing. Check the description, audience, starter prompts, and any quality label.
- Create a connection. The client connects to the chosen public hub.
- Use narrow access. Public hub clients are designed for safe question-style access first.
- Review Billing when you need more. Move toward the workspace path when you need private hubs, more connections, separate skills, or runtime config.
Stop after one public hub connection and confirm the client exists with narrow permissions. That first pass teaches the same pattern you will use for owned hubs later.
Public Preview and Signup
Section titled “Public Preview and Signup”Some public hubs let you try a browser preview before creating a connection. Start with a starter prompt, then create an account only when you want the hub saved to your own flow.
Preview is available only while the hub is active, public, and its preview status is ready. A recent visibility or hub update can briefly show preview as refreshing. If preview remains unavailable, use the normal connection path or check the hub status instead of repeatedly submitting the prompt.
The preview bridge is released independently from the main API and hub listener. The hub controller checks compatibility before starting it. A bridge problem degrades only browser preview: it does not make a private hub public, add preview credentials to a private hub, or stop normal hub control-plane reconciliation. Use the normal connection path while preview is recovering.
If a public hub link sends you to account creation, finish Sign In and Account Access and return to the same hub. The selected public hub should stay attached to the signup path.
API Example Links
Section titled “API Example Links”Some public hub listings may include a simple API example for developers. Treat it as a learning example, not as a secret-bearing setup path.
If the example needs private setup material, create a connection first and keep setup links, connection files, and copied commands private.
Public Hub vs Owned Hub
Section titled “Public Hub vs Owned Hub”| Choice | You manage | Good for |
|---|---|---|
| Public hub | Your connection and permissions. | Learning, trying examples, and Free-path exploration without personal memory. |
| Owned hub | Hub, skills, runtime config, clients, memory, and permissions. | Private workspace experiences and team-controlled setup. |
Public Hub Setup Looks Right When
Section titled “Public Hub Setup Looks Right When”A public hub setup looks right when:
- the listing explains what the hub is for;
- audience and age guidance fit your use;
- the client name explains the purpose;
- permissions are narrow;
- Dashboard shows no unexpected attention item.